
Quests
Objectives, reward choices, and quest givers. Dialogue is hidden until you choose to reveal it.
How quests and commissions work
- Open Quests beneath Portal in High Anchorage. The field journal is read-only. Story assignments activate when their expedition or Pinnacle is discovered; commissions are accepted in Town.
- Each of the three commission slots offers up to three currently eligible assignments from discovered destinations. Choose one per slot. Claiming a reward, or replacing an assignment whose destination has become locked, starts that slot's four-active-hour cooldown. Offline time does not count.
- Combat, harvest, chest, and extraction objectives must be completed in the named destination at or above the assignment's reward level. Story reward level is set when the assignment activates; commissions use the main character's level when accepted, with the quest's minimum level as a floor.
- Delivery objectives read Shared Inventory and Stash. Materials are consumed only when the reward is claimed, using Inventory first and Stash second. Items in Mail or paid crafting escrow do not count as available delivery stock.
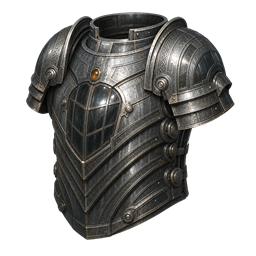
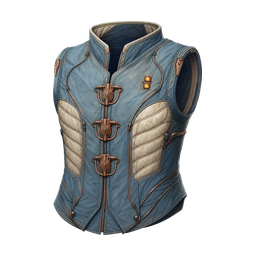
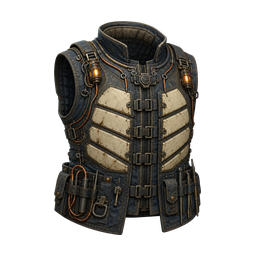
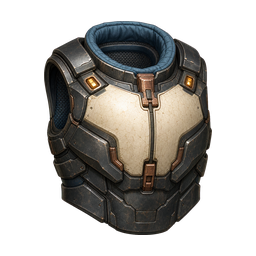
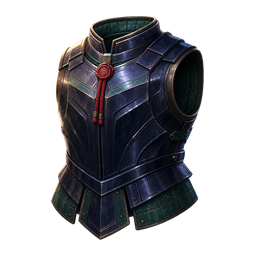
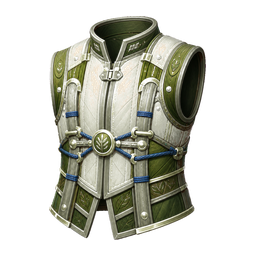
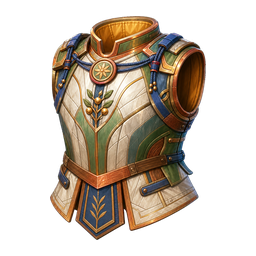
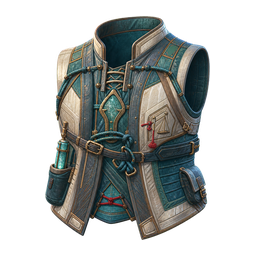
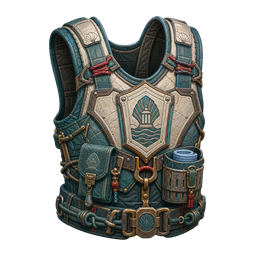
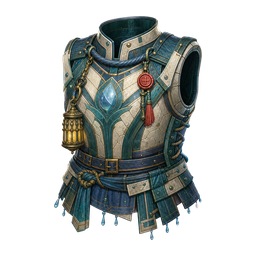
- Choose one of the listed armor rewards and receive the displayed Aurel amount. Reward affixes and rolls are fixed for that assignment and reward level; reopening the journal does not reroll them. Full Shared Inventory sends the equipment reward to Mail.
- Story rewards allow up to six legal ordinary affixes; commission rewards allow up to four, subject to the reward level's normal affix limit and compatible pool. Quest rewards use upper-quartile rolls, not guaranteed maximum rolls.
- Completed story quests remain completed after ascension. Assignments whose required level or destination is no longer accessible pause until available again. Quests do not grant XP or introduce a separate currency.
 Story Quests · Greenveil FrontierA Foothold in GreenveilSel Arven · Level 1 minimumView assignment
Sel Arven · Greenveil Frontier
Objectives
- Defeat hostiles in Greenveil Frontier: 20
- Deliver Rainwood Logs: 8. Consumed at turn-in. Find farming locations
- Deliver Menderleaf: 6. Consumed at turn-in. Find farming locations
Rewards
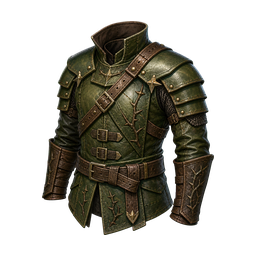
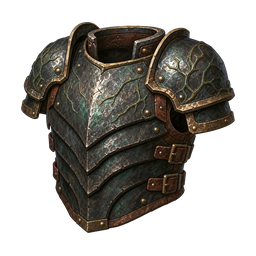
Aurel: 90 + (6 × reward level), plus one armor choice. The journal fixes the reward level when the assignment begins.

Reveal quest dialogue (spoilers)
Introduction
The old survey road is still there. The people who kept it safe are not. Clear a passage, and bring back enough rainwood and menderleaf for the crews following you. We need a foothold, not another abandoned camp.
Completion
These supplies will keep the next crew working. Your account of the road matters just as much. I'll mark the hazards you found, and Jori has set aside something for your next crossing.
 Story Quests · Glassmoon Memorial ReachLamps for the RememberedHesta Coil · Level 10 minimumView assignment
Hesta Coil · Glassmoon Memorial Reach
Objectives
- Defeat hostiles in Glassmoon Memorial Reach: 20
- Deliver Marrow Silver Ore: 8. Consumed at turn-in. Find farming locations
- Deliver Bell Sage: 6. Consumed at turn-in. Find farming locations
Rewards
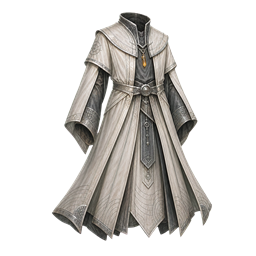
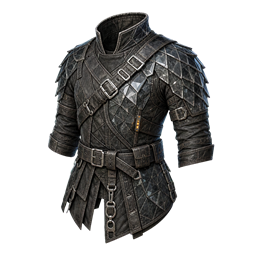
Aurel: 90 + (6 × reward level), plus one armor choice. The journal fixes the reward level when the assignment begins.
Reveal quest dialogue (spoilers)
Introduction
A memorial district needs more than a sealed door to stay habitable. Its defenders won't let repair crews near the failing works. Make some room, then bring me marrow silver and bell sage. We can mend equipment here without disturbing anyone's grave.
Completion
Good silver, and the sage survived the crossing. I'll put both into the repair stores. Your report will help the crews tell a working seal from a door that was meant to stay closed.
Story Quests · Cradle DriftThe Shift That Never EndedHesta Coil · Level 20 minimumView assignment
Objectives
- Defeat hostiles in Cradle Drift: 20
- Deliver Cradle Nickel Ballast: 8. Consumed at turn-in. Find farming locations
- Deliver Sleepmint: 6. Consumed at turn-in. Find farming locations
Rewards
Aurel: 90 + (6 × reward level), plus one armor choice. The journal fixes the reward level when the assignment begins.
Reveal quest dialogue (spoilers)
Introduction
The caretakers are still tending their plots, but their schedules don't agree. Some of those arks arrived generations apart. Get through the active defenses and recover nickel ballast and sleepmint. I want to see what the old crews were keeping in service.
Completion
Different crews, different schedules, and no one left to settle the argument. The ballast is sound. We'll use what you brought, and keep your observations with the repair notes.
Story Quests · Korr Deepforge MoonsAfter the Last ShiftHesta Coil · Level 30 minimumView assignment
Hesta Coil · Korr Deepforge Moons
Objectives
- Defeat hostiles in Korr Deepforge Moons: 20
- Deliver Deepforge Ore: 8. Consumed at turn-in. Find farming locations
- Deliver Ash Balm: 6. Consumed at turn-in. Find farming locations
Rewards
Aurel: 90 + (6 × reward level), plus one armor choice. The journal fixes the reward level when the assignment begins.
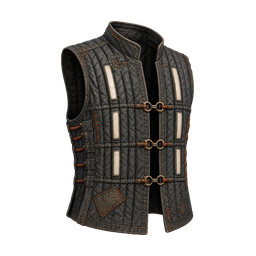
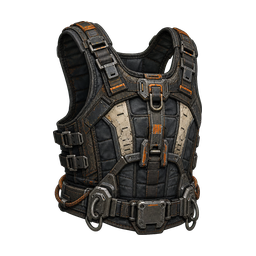

Reveal quest dialogue (spoilers)
Introduction
Those workings were abandoned, not shut down. The machines are still carrying the last shift's orders under all that pressure. Clear the threats on your route and bring back deepforge ore and ash balm. Don't mistake a quiet machine for a safe one.
Completion
The ore can go straight to the workshop. Keep the balm away from the hot benches. Your report explains why the old works still resist every visitor; it doesn't make those orders worth obeying.
 Story Quests · The Sable Writ IslesAn Order Without an EndJori Dhal · Level 40 minimumView assignment
Jori Dhal · The Sable Writ Isles
Objectives
- Defeat hostiles in The Sable Writ Isles: 20
- Deliver Nightiron Ore: 8. Consumed at turn-in. Find farming locations
- Deliver Red Seal Blossom: 6. Consumed at turn-in. Find farming locations
Rewards
Aurel: 90 + (6 × reward level), plus one armor choice. The journal fixes the reward level when the assignment begins.
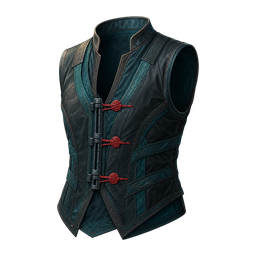
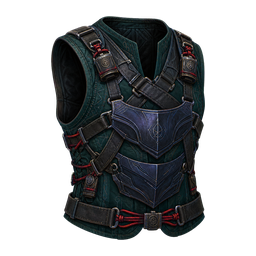
Reveal quest dialogue (spoilers)
Introduction
A writ can outlive the person who signed it. On those islands, someone will still enforce it. Keep your party together, break through the hostile patrols, and bring back nightiron and red seal blossom. Anchorage has practical uses for both.
Completion
I'll see these go to crews who need them. From what you've told me, the patrols care more about a seal than the people in front of them. Keep your own judgment when you go back.
 Story Quests · Asterhome: The Unreceived WorldA Table Still SetNessa Quill · Level 50 minimumView assignment
Nessa Quill · Asterhome: The Unreceived World
Objectives
- Defeat hostiles in Asterhome: The Unreceived World: 20
- Deliver Choirstone Quartz: 8. Consumed at turn-in. Find farming locations
- Deliver Wakeleaf: 6. Consumed at turn-in. Find farming locations
Rewards
Aurel: 90 + (6 × reward level), plus one armor choice. The journal fixes the reward level when the assignment begins.

Reveal quest dialogue (spoilers)
Introduction
Homes, gardens, even schools, all waiting for people who never landed. I can't stop thinking about that. Get past the hostile caretakers and bring back choirstone and wakeleaf. Hesta can use the stone, and the leaves will feed a supply shelf that actually gets emptied.
Completion
I'll put the wakeleaf where someone will use it today. Hesta is waiting for the stone. Thank you for telling me what you found there, too. An empty home deserves more than a mark on a cargo list.
Story Quests · Nhal-Serat Mirror BeltRoom for an Unwritten AnswerSel Arven · Level 60 minimumView assignment
Sel Arven · Nhal-Serat Mirror Belt
Objectives
- Defeat hostiles in Nhal-Serat Mirror Belt: 20
- Deliver Lenssilver Ore: 8. Consumed at turn-in. Find farming locations
- Deliver Parallax Aloe: 6. Consumed at turn-in. Find farming locations
Rewards
Aurel: 90 + (6 × reward level), plus one armor choice. The journal fixes the reward level when the assignment begins.



Reveal quest dialogue (spoilers)
Introduction
The observatories sell forecasts about people who never asked to be studied. I want an account from someone who was actually there. Deal with the threats on your route, and bring back lenssilver and parallax aloe for the crews following you.
Completion
I'll record what you saw, including what surprised you. A forecast isn't a witness. The supplies are welcome, and your account leaves the next crew more than one version of what to expect.
Story Quests · Vaelari Tide CourtsThe Right to LeaveNessa Quill · Level 70 minimumView assignment
Nessa Quill · Vaelari Tide Courts
Objectives
- Defeat hostiles in Vaelari Tide Courts: 20
- Deliver Pearlstone: 8. Consumed at turn-in. Find farming locations
- Deliver Tidesage: 6. Consumed at turn-in. Find farming locations
Rewards
Aurel: 90 + (6 × reward level), plus one armor choice. The journal fixes the reward level when the assignment begins.
Reveal quest dialogue (spoilers)
Introduction
The courts know how to shelter someone. Letting them leave seems harder. Keep a way through the hostile defenders and bring back pearlstone and tidesage. We can put them to work here without asking anyone to surrender their freedom for the help.
Completion
The stone goes to repairs, the sage to supplies. No oath, no guardianship, just what people need. I hope the next travelers you meet there get to choose where they go.
Story Quests · Moonfen Salvage ReachWhere the Ruins Took RootSel Arven · Level 100 minimumView assignment
Sel Arven · Moonfen Salvage Reach
Objectives
- Defeat hostiles in Moonfen Salvage Reach: 40
- Complete fishing at Reedwater Fishing Pool: 3
- Complete scrounging at Moonfen Salvage Heap: 3
- Return through an open extraction portal in Moonfen Salvage Reach: 1
Rewards
Aurel: 600 + (12 × reward level), plus one armor choice. The journal fixes the reward level when the assignment begins.
Reveal quest dialogue (spoilers)
Introduction
Moonfen brings green woodland and pale memorial works into the same crossing. I need more than a glimpse from the arrival dais. Fish its reedwater pools, search the salvage, and hold out until an extraction portal opens. Come back with an account we can trust.
Completion
You made the whole crossing. Woodland and memorial works belong in the same report now, even if we don't yet know how they came together. I'll keep that question open.
Story Quests · Cinderwake CalderaGardens Above the PressureSel Arven · Level 100 minimumView assignment
Sel Arven · Cinderwake Caldera
Objectives
- Defeat hostiles in Cinderwake Caldera: 40
- Complete fishing at Cinderwake Silverfin Pool: 3
- Complete scrounging at Cinderwake Ceramic Salvage Heap: 3
- Return through an open extraction portal in Cinderwake Caldera: 1
Rewards
Aurel: 600 + (12 × reward level), plus one armor choice. The journal fixes the reward level when the assignment begins.
Reveal quest dialogue (spoilers)
Introduction
Cultivated terraces above old cooling works. Cinderwake puts two kinds of caretaking uncomfortably close together. Work the silverfin pools and ceramic salvage, push through the hostiles, and return through a portal when extraction opens. Don't gamble the party on an early way home.
Completion
The gardens and the pressure works are both in your account, with a safe return to finish it. Hesta will want the practical details. I'm still trying to understand why these routes meet.
Story Quests · Gutterbloom UnderwaysOrders Under the GardensSel Arven · Level 150 minimumView assignment
Sel Arven · Gutterbloom Underways
Objectives
- Defeat hostiles in Gutterbloom Underways: 40
- Complete fishing at Gutterbloom Gutterfin Pool: 3
- Complete scrounging at Gutterbloom Courtyard Salvage: 3
- Return through an open extraction portal in Gutterbloom Underways: 1
Rewards
Aurel: 600 + (12 × reward level), plus one armor choice. The journal fixes the reward level when the assignment begins.
Reveal quest dialogue (spoilers)
Introduction
Masked patrols below overgrown gardens, with caretakers still on duty. Gutterbloom sounds familiar in ways I don't like. Fish the gutterfin pools, search the courtyard salvage, and see the crossing through to extraction. Tell me what those old orders are protecting now.
Completion
Your return gives us a complete route report, not another guess from the threshold. Enforcement and hospitality can both outlive their purpose. I'll keep the details together without pretending they're the same thing.
Story Quests · Mirrortide ExpanseBeyond the Promised ShoreSel Arven · Level 150 minimumView assignment
Sel Arven · Mirrortide Expanse
Objectives
- Defeat hostiles in Mirrortide Expanse: 40
- Complete fishing at Sunscale Bream Pool: 3
- Complete scrounging at Mirrortide Lens-Rig Salvage: 3
- Return through an open extraction portal in Mirrortide Expanse: 1
Rewards
Aurel: 600 + (12 × reward level), plus one armor choice. The journal fixes the reward level when the assignment begins.
Reveal quest dialogue (spoilers)
Introduction
Broken observatories look down on sanctuary waters at Mirrortide. Both places once promised to know what was best for someone. Work the sunscale pools and lens-rig salvage, face the hostile patrols, and return when extraction opens. I want your account, not their promise.
Completion
You crossed it and came home on your own terms. I'll file the routes you used and the dangers you found. Whatever links these places, a person still has to choose a way through.
 Story Quests · The Thorn-Crowned BehemothThe Oldest GroundEryn Val · Level 100 minimumView assignment
Eryn Val · The Thorn-Crowned Behemoth
Objectives
- Win the standalone Pinnacle: The Thorn-Crowned Behemoth: 1
Rewards
Aurel: 600 + (10 × reward level), plus one armor choice. The journal fixes the reward level when the assignment begins.
Reveal quest dialogue (spoilers)
Introduction
The survey ended, but its consequences stayed in Greenveil. Face the Thorn-Crowned Behemoth on its own ground. I won't call it a monster just to make the crossing easier to explain.
Completion
You stood before what the survey left behind. A victory doesn't erase that history. Bring the account home with the same care you would bring a wounded companion.
Story Quests · The Unwritten BellA Place for the MissingEryn Val · Level 100 minimumView assignment
Objectives
- Win the standalone Pinnacle: The Unwritten Bell: 1
Rewards
Aurel: 600 + (10 × reward level), plus one armor choice. The journal fixes the reward level when the assignment begins.
Reveal quest dialogue (spoilers)
Introduction
Some names were struck out before the memorial bells could ring for them. The Unwritten Bell waits where those names should have been. Face it, and remember why this isn't an ordinary salvage trip.
Completion
Thank you for bringing an account of the Bell back to Anchorage. We can't supply the names that were taken away. We can refuse to pretend that nothing is missing.
Story Quests · The First Lullaby EngineA Nursery Without an ArrivalEryn Val · Level 100 minimumView assignment
Eryn Val · The First Lullaby Engine
Objectives
- Win the standalone Pinnacle: The First Lullaby Engine: 1
Rewards
Aurel: 600 + (10 × reward level), plus one armor choice. The journal fixes the reward level when the assignment begins.
Reveal quest dialogue (spoilers)
Introduction
The First Lullaby Engine still keeps a nursery ready. Its duty has outlasted the journey it was built to serve. Face the engine itself; the caretakers outside cannot answer for it.
Completion
It was built to care for arrivals, not to decide forever that waiting was the only choice. Keep that distinction in your account. There was care in its purpose, even when it became dangerous.
Story Quests · The Crown of CindersSomeone Must Set It DownEryn Val · Level 100 minimumView assignment
Eryn Val · The Crown of Cinders
Objectives
- Win the standalone Pinnacle: The Crown of Cinders: 1
Rewards
Aurel: 600 + (10 × reward level), plus one armor choice. The journal fixes the reward level when the assignment begins.
Reveal quest dialogue (spoilers)
Introduction
The regent is still holding the load because no successor came. Now every arrival is another test. Face the Crown of Cinders. You can answer that challenge without promising to carry it forever.
Completion
The challenge is over, and you're back. Whatever the regent expected, you did not have to become another part of the abandoned shift. Rest before you take up the next burden.
Story Quests · The Court Without AppealAn Answer Beyond the BenchEryn Val · Level 150 minimumView assignment
Eryn Val · The Court Without Appeal
Objectives
- Win the standalone Pinnacle: The Court Without Appeal: 1
Rewards
Aurel: 900 + (10 × reward level), plus one armor choice. The journal fixes the reward level when the assignment begins.
Reveal quest dialogue (spoilers)
Introduction
The Court Without Appeal hears every claim and recognizes no authority above its own. Face that bench in its own arena. An accepted petition is not the same as a fair hearing.
Completion
You found an answer the court could not close with another ruling. That doesn't settle every claim in the islands. It does mean this bench is not beyond challenge.
Story Quests · The Unclaimed HouseholdAn Arrival Is Not a DebtEryn Val · Level 150 minimumView assignment
Eryn Val · The Unclaimed Household
Objectives
- Win the standalone Pinnacle: The Unclaimed Household: 1
Rewards
Aurel: 900 + (10 × reward level), plus one armor choice. The journal fixes the reward level when the assignment begins.
Reveal quest dialogue (spoilers)
Introduction
The Unclaimed Household has finally registered an arrival. It will not release anyone while places at its table remain empty. Face the welcome system, but remember that missing people cannot be replaced by whoever comes through the door.
Completion
You returned as yourselves. That matters. Asterhome's missing households still deserve remembrance, but they cannot be filled by keeping another traveler against their will.
Story Quests · The Certain HorizonMore Than One OutcomeEryn Val · Level 150 minimumView assignment
Eryn Val · The Certain Horizon
Objectives
- Win the standalone Pinnacle: The Certain Horizon: 1
Rewards
Aurel: 900 + (10 × reward level), plus one armor choice. The journal fixes the reward level when the assignment begins.
Reveal quest dialogue (spoilers)
Introduction
The Certain Horizon offers different paths toward the same permitted outcome. Face the engine that has mistaken its forecast for a right to decide. Keep your own answer until the end.
Completion
The forecast did not get the last word. We should be careful with what we make of that; one victory doesn't make tomorrow certain. It leaves tomorrow open.
Story Quests · The Mercy That Will Not ReleaseWhen Shelter OpensEryn Val · Level 150 minimumView assignment
Eryn Val · The Mercy That Will Not Release
Objectives
- Win the standalone Pinnacle: The Mercy That Will Not Release: 1
Rewards
Aurel: 900 + (10 × reward level), plus one armor choice. The journal fixes the reward level when the assignment begins.
Reveal quest dialogue (spoilers)
Introduction
The drowned sanctuary is still under emergency guardianship. Every request to leave is treated as a reason to stay. Face the Mercy That Will Not Release. Protection should not require surrendering every future choice.
Completion
You came back through a door the court meant to keep shut. Its protection was real, and so was the confinement. We must remember both if we hope to do better.
Story Quests · Grand Pinnacle: The Eight GatesThe Last of the Eight GatesEryn Val · Level 200 minimumView assignment
Eryn Val · Grand Pinnacle: The Eight Gates
Objectives
- Complete the entire Grand Pinnacle sequence: 1
Rewards
Aurel: 1500 + (10 × reward level), plus one armor choice. The journal fixes the reward level when the assignment begins.
Reveal quest dialogue (spoilers)
Introduction
A lone figure waits between eight gates. The challenges beyond them will be familiar, but this crossing has an end of its own. See the whole trial through. Until that figure chooses to speak, I won't invent a name or a purpose for him.
Completion
Auralis has given you passage to the Chronicle Machine, not a promise that every future will be kind. Take what you learned to Saira Vesh. Another beginning is a choice to make when you are ready, not a debt you owe.
Commissions · Greenveil FrontierGreenveil Frontier: Clear the RouteJori Dhal · Level 1 minimumView assignment
Jori Dhal · Greenveil Frontier · Commission slot 1
Objectives
- Defeat hostiles in Greenveil Frontier: 12
Rewards
Aurel: 25 + (3 × reward level), plus one armor choice. The journal fixes the reward level when the assignment begins.
Reveal quest dialogue (spoilers)
Introduction
Crews are losing time on the old survey roads. Thin the hostiles along your route so the next party has room to work.
Completion
That gives the next crew some breathing room. Here's the payment we agreed on.
Commissions · Greenveil FrontierGreenveil Frontier: Supply ParcelNessa Quill · Level 1 minimumView assignment
Nessa Quill · Greenveil Frontier · Commission slot 2
Objectives
- Deliver Rainwood Logs: 4. Consumed at turn-in. Find farming locations
- Deliver Menderleaf: 4. Consumed at turn-in. Find farming locations
Rewards
Aurel: 40 + (3 × reward level), plus one armor choice. The journal fixes the reward level when the assignment begins.
Reveal quest dialogue (spoilers)
Introduction
I need rainwood for the stall repairs and menderleaf for the supply shelf. A small bundle of each will do.
Completion
That's the parcel I needed. I'll put it straight into the concourse stores. Thank you.
Commissions · Greenveil FrontierGreenveil Frontier: Lost StoresHesta Coil · Level 1 minimumView assignment
Hesta Coil · Greenveil Frontier · Commission slot 3
Objectives
- Open chests in Greenveil Frontier: 3
Rewards
Aurel: 30 + (3 × reward level), plus one armor choice. The journal fixes the reward level when the assignment begins.
Reveal quest dialogue (spoilers)
Introduction
The survey crews left useful caches behind. Open what you find along the roads and check the old stores.
Completion
I'll add your work to the crew notes. Take your payment before the next crossing.
Commissions · Glassmoon Memorial ReachGlassmoon Memorial Reach: Clear the RouteJori Dhal · Level 10 minimumView assignment
Jori Dhal · Glassmoon Memorial Reach · Commission slot 1
Objectives
- Defeat hostiles in Glassmoon Memorial Reach: 12
Rewards
Aurel: 25 + (3 × reward level), plus one armor choice. The journal fixes the reward level when the assignment begins.
Reveal quest dialogue (spoilers)
Introduction
The memorial approaches are becoming difficult to cross. Deal with the defenders on your route; the crews still need those roads.
Completion
That gives the next crew some breathing room. Here's the payment we agreed on.
Commissions · Glassmoon Memorial ReachGlassmoon Memorial Reach: Supply ParcelNessa Quill · Level 10 minimumView assignment
Nessa Quill · Glassmoon Memorial Reach · Commission slot 2
Objectives
- Deliver Marrow Silver Ore: 4. Consumed at turn-in. Find farming locations
- Deliver Bell Sage: 4. Consumed at turn-in. Find farming locations
Rewards
Aurel: 40 + (3 × reward level), plus one armor choice. The journal fixes the reward level when the assignment begins.
Reveal quest dialogue (spoilers)
Introduction
The next memorial crew is short of marrow silver and bell sage. Bring a little of each back to Anchorage.
Completion
That's the parcel I needed. I'll put it straight into the concourse stores. Thank you.
Commissions · Glassmoon Memorial ReachGlassmoon Memorial Reach: Fresh GatheringHesta Coil · Level 10 minimumView assignment
Hesta Coil · Glassmoon Memorial Reach · Commission slot 3
Objectives
- Complete harvests at Bell Sage: 3
Rewards
Aurel: 30 + (3 × reward level), plus one armor choice. The journal fixes the reward level when the assignment begins.
Reveal quest dialogue (spoilers)
Introduction
Hesta needs a fresh account of the bell sage beds. Work several patches while you're in the memorial districts.
Completion
I'll add your work to the crew notes. Take your payment before the next crossing.
Commissions · Cradle DriftCradle Drift: Clear the RouteJori Dhal · Level 20 minimumView assignment
Jori Dhal · Cradle Drift · Commission slot 1
Objectives
- Defeat hostiles in Cradle Drift: 12
Rewards
Aurel: 25 + (3 × reward level), plus one armor choice. The journal fixes the reward level when the assignment begins.
Reveal quest dialogue (spoilers)
Introduction
The caretakers are treating passing crews as interruptions. Clear the hostile machines you encounter around the old ark works.
Completion
That gives the next crew some breathing room. Here's the payment we agreed on.
Commissions · Cradle DriftCradle Drift: Supply ParcelNessa Quill · Level 20 minimumView assignment
Nessa Quill · Cradle Drift · Commission slot 2
Objectives
- Deliver Cradle Nickel Ballast: 4. Consumed at turn-in. Find farming locations
- Deliver Sleepmint: 4. Consumed at turn-in. Find farming locations
Rewards
Aurel: 40 + (3 × reward level), plus one armor choice. The journal fixes the reward level when the assignment begins.
Reveal quest dialogue (spoilers)
Introduction
Cradle crews need nickel ballast for repairs and sleepmint for their supplies. We only need a small batch this shift.
Completion
That's the parcel I needed. I'll put it straight into the concourse stores. Thank you.
Commissions · Cradle DriftCradle Drift: Lost StoresHesta Coil · Level 20 minimumView assignment
Hesta Coil · Cradle Drift · Commission slot 3
Objectives
- Open chests in Cradle Drift: 3
Rewards
Aurel: 30 + (3 × reward level), plus one armor choice. The journal fixes the reward level when the assignment begins.
Reveal quest dialogue (spoilers)
Introduction
Check the old stores along your Cradle route. Open the caches you find before their contents are lost to another maintenance cycle.
Completion
I'll add your work to the crew notes. Take your payment before the next crossing.
Commissions · Korr Deepforge MoonsKorr Deepforge Moons: Clear the RouteJori Dhal · Level 30 minimumView assignment
Jori Dhal · Korr Deepforge Moons · Commission slot 1
Objectives
- Defeat hostiles in Korr Deepforge Moons: 12
Rewards
Aurel: 25 + (3 × reward level), plus one armor choice. The journal fixes the reward level when the assignment begins.
Reveal quest dialogue (spoilers)
Introduction
The abandoned workings are still defending their last shift. Cut down the threats blocking the routes our crews use.
Completion
That gives the next crew some breathing room. Here's the payment we agreed on.
Commissions · Korr Deepforge MoonsKorr Deepforge Moons: Supply ParcelNessa Quill · Level 30 minimumView assignment
Nessa Quill · Korr Deepforge Moons · Commission slot 2
Objectives
- Deliver Deepforge Ore: 4. Consumed at turn-in. Find farming locations
- Deliver Ash Balm: 4. Consumed at turn-in. Find farming locations
Rewards
Aurel: 40 + (3 × reward level), plus one armor choice. The journal fixes the reward level when the assignment begins.
Reveal quest dialogue (spoilers)
Introduction
Bring deepforge ore and ash balm for the next repair crew. Enough for the job, with some left in your own stores.
Completion
That's the parcel I needed. I'll put it straight into the concourse stores. Thank you.
Commissions · Korr Deepforge MoonsKorr Deepforge Moons: Fresh GatheringHesta Coil · Level 30 minimumView assignment
Hesta Coil · Korr Deepforge Moons · Commission slot 3
Objectives
- Complete harvests at Ash Balm Cluster: 3
Rewards
Aurel: 30 + (3 × reward level), plus one armor choice. The journal fixes the reward level when the assignment begins.
Reveal quest dialogue (spoilers)
Introduction
Work the ash balm clusters while you're in the workings. Hesta wants to know which beds are still accessible.
Completion
I'll add your work to the crew notes. Take your payment before the next crossing.
Commissions · The Sable Writ IslesThe Sable Writ Isles: Clear the RouteJori Dhal · Level 40 minimumView assignment
Jori Dhal · The Sable Writ Isles · Commission slot 1
Objectives
- Defeat hostiles in The Sable Writ Isles: 12
Rewards
Aurel: 25 + (3 × reward level), plus one armor choice. The journal fixes the reward level when the assignment begins.
Reveal quest dialogue (spoilers)
Introduction
The island patrols are closing useful routes again. Break through the hostile groups your party meets.
Completion
That gives the next crew some breathing room. Here's the payment we agreed on.
Commissions · The Sable Writ IslesThe Sable Writ Isles: Supply ParcelNessa Quill · Level 40 minimumView assignment
Nessa Quill · The Sable Writ Isles · Commission slot 2
Objectives
- Deliver Nightiron Ore: 4. Consumed at turn-in. Find farming locations
- Deliver Red Seal Blossom: 4. Consumed at turn-in. Find farming locations
Rewards
Aurel: 40 + (3 × reward level), plus one armor choice. The journal fixes the reward level when the assignment begins.
Reveal quest dialogue (spoilers)
Introduction
The concourse order calls for nightiron and red seal blossom. Bring a small parcel back with your usual supplies.
Completion
That's the parcel I needed. I'll put it straight into the concourse stores. Thank you.
Commissions · The Sable Writ IslesThe Sable Writ Isles: Lost StoresHesta Coil · Level 40 minimumView assignment
Hesta Coil · The Sable Writ Isles · Commission slot 3
Objectives
- Open chests in The Sable Writ Isles: 3
Rewards
Aurel: 30 + (3 × reward level), plus one armor choice. The journal fixes the reward level when the assignment begins.
Reveal quest dialogue (spoilers)
Introduction
Check the sealed caches along your island route. Anything left under those patrols needs a careful look.
Completion
I'll add your work to the crew notes. Take your payment before the next crossing.
Commissions · Asterhome: The Unreceived WorldAsterhome: The Unreceived World: Clear the RouteJori Dhal · Level 50 minimumView assignment
Jori Dhal · Asterhome: The Unreceived World · Commission slot 1
Objectives
- Defeat hostiles in Asterhome: The Unreceived World: 12
Rewards
Aurel: 25 + (3 × reward level), plus one armor choice. The journal fixes the reward level when the assignment begins.
Reveal quest dialogue (spoilers)
Introduction
The welcome systems are turning on visiting crews. Clear the hostile caretakers on your route through the receiving districts.
Completion
That gives the next crew some breathing room. Here's the payment we agreed on.
Commissions · Asterhome: The Unreceived WorldAsterhome: The Unreceived World: Supply ParcelNessa Quill · Level 50 minimumView assignment
Nessa Quill · Asterhome: The Unreceived World · Commission slot 2
Objectives
- Deliver Choirstone Quartz: 4. Consumed at turn-in. Find farming locations
- Deliver Wakeleaf: 4. Consumed at turn-in. Find farming locations
Rewards
Aurel: 40 + (3 × reward level), plus one armor choice. The journal fixes the reward level when the assignment begins.
Reveal quest dialogue (spoilers)
Introduction
Hesta asked for choirstone, and I'm nearly out of wakeleaf. Bring a little of each from Asterhome.
Completion
That's the parcel I needed. I'll put it straight into the concourse stores. Thank you.
Commissions · Asterhome: The Unreceived WorldAsterhome: The Unreceived World: Fresh GatheringHesta Coil · Level 50 minimumView assignment
Hesta Coil · Asterhome: The Unreceived World · Commission slot 3
Objectives
- Complete harvests at Wakeleaf Patch: 3
Rewards
Aurel: 30 + (3 × reward level), plus one armor choice. The journal fixes the reward level when the assignment begins.
Reveal quest dialogue (spoilers)
Introduction
Gather from the wakeleaf beds in Asterhome. I'd like a fresh account of the gardens the caretakers are still tending.
Completion
I'll add your work to the crew notes. Take your payment before the next crossing.
Commissions · Nhal-Serat Mirror BeltNhal-Serat Mirror Belt: Clear the RouteJori Dhal · Level 60 minimumView assignment
Jori Dhal · Nhal-Serat Mirror Belt · Commission slot 1
Objectives
- Defeat hostiles in Nhal-Serat Mirror Belt: 12
Rewards
Aurel: 25 + (3 × reward level), plus one armor choice. The journal fixes the reward level when the assignment begins.
Reveal quest dialogue (spoilers)
Introduction
The observatory approaches need clearing. Deal with the hostile groups you encounter without letting their forecasts set your course.
Completion
That gives the next crew some breathing room. Here's the payment we agreed on.
Commissions · Nhal-Serat Mirror BeltNhal-Serat Mirror Belt: Supply ParcelNessa Quill · Level 60 minimumView assignment
Nessa Quill · Nhal-Serat Mirror Belt · Commission slot 2
Objectives
- Deliver Lenssilver Ore: 4. Consumed at turn-in. Find farming locations
- Deliver Parallax Aloe: 4. Consumed at turn-in. Find farming locations
Rewards
Aurel: 40 + (3 × reward level), plus one armor choice. The journal fixes the reward level when the assignment begins.
Reveal quest dialogue (spoilers)
Introduction
The survey crews need lenssilver and parallax aloe. A small delivery will cover this shift's requisition.
Completion
That's the parcel I needed. I'll put it straight into the concourse stores. Thank you.
Commissions · Nhal-Serat Mirror BeltNhal-Serat Mirror Belt: Lost StoresHesta Coil · Level 60 minimumView assignment
Hesta Coil · Nhal-Serat Mirror Belt · Commission slot 3
Objectives
- Open chests in Nhal-Serat Mirror Belt: 3
Rewards
Aurel: 30 + (3 × reward level), plus one armor choice. The journal fixes the reward level when the assignment begins.
Reveal quest dialogue (spoilers)
Introduction
Open the caches you find around the observatory routes. Their actual contents are more useful to us than a forecast.
Completion
I'll add your work to the crew notes. Take your payment before the next crossing.
Commissions · Vaelari Tide CourtsVaelari Tide Courts: Clear the RouteJori Dhal · Level 70 minimumView assignment
Jori Dhal · Vaelari Tide Courts · Commission slot 1
Objectives
- Defeat hostiles in Vaelari Tide Courts: 12
Rewards
Aurel: 25 + (3 × reward level), plus one armor choice. The journal fixes the reward level when the assignment begins.
Reveal quest dialogue (spoilers)
Introduction
The sanctuary routes are blocked by hostile defenders. Clear the groups your party meets so those paths remain passable.
Completion
That gives the next crew some breathing room. Here's the payment we agreed on.
Commissions · Vaelari Tide CourtsVaelari Tide Courts: Supply ParcelNessa Quill · Level 70 minimumView assignment
Nessa Quill · Vaelari Tide Courts · Commission slot 2
Objectives
- Deliver Pearlstone: 4. Consumed at turn-in. Find farming locations
- Deliver Tidesage: 4. Consumed at turn-in. Find farming locations
Rewards
Aurel: 40 + (3 × reward level), plus one armor choice. The journal fixes the reward level when the assignment begins.
Reveal quest dialogue (spoilers)
Introduction
Bring pearlstone and tidesage for the concourse stores. We have work for both and no need to empty your packs.
Completion
That's the parcel I needed. I'll put it straight into the concourse stores. Thank you.
Commissions · Vaelari Tide CourtsVaelari Tide Courts: Fresh GatheringHesta Coil · Level 70 minimumView assignment
Hesta Coil · Vaelari Tide Courts · Commission slot 3
Objectives
- Complete harvests at Tidesage Patch: 3
Rewards
Aurel: 30 + (3 × reward level), plus one armor choice. The journal fixes the reward level when the assignment begins.
Reveal quest dialogue (spoilers)
Introduction
Work the tidesage beds along the sanctuary routes. Tell me which ones a visiting crew can still reach.
Completion
I'll add your work to the crew notes. Take your payment before the next crossing.
Commissions · Moonfen Salvage ReachMoonfen Salvage Reach: Clear the CrossingJori Dhal · Level 100 minimumView assignment
Jori Dhal · Moonfen Salvage Reach · Commission slot 1
Objectives
- Defeat hostiles in Moonfen Salvage Reach: 18
Rewards
Aurel: 120 + (4 × reward level), plus one armor choice. The journal fixes the reward level when the assignment begins.
Reveal quest dialogue (spoilers)
Introduction
If you're making the Moonfen Salvage Reach crossing, cut down the hostiles along your route. Keep your party together until extraction opens.
Completion
Your work will help the next crew through. Here's the payment for the threats you dealt with.
Commissions · Moonfen Salvage ReachMoonfen Salvage Reach: Supply ParcelNessa Quill · Level 100 minimumView assignment
Nessa Quill · Moonfen Salvage Reach · Commission slot 2
Objectives
- Deliver Moonfen Reedfin: 4. Consumed at turn-in. Find farming locations
- Deliver Greenveil Iron Ore: 4. Consumed at turn-in. Find farming locations
Rewards
Aurel: 140 + (4 × reward level), plus one armor choice. The journal fixes the reward level when the assignment begins.
Reveal quest dialogue (spoilers)
Introduction
I can use Moonfen Reedfin and Greenveil Iron Ore from the Moonfen Salvage Reach supplies. Only take this parcel on if you have the stock or already mean to make the crossing.
Completion
That's enough for this requisition. I'll get these supplies to the people waiting for them.
Commissions · Moonfen Salvage ReachMoonfen Salvage Reach: Pools and SalvageHesta Coil · Level 100 minimumView assignment
Hesta Coil · Moonfen Salvage Reach · Commission slot 3
Objectives
- Complete fishing at Reedwater Fishing Pool: 2
- Complete scrounging at Moonfen Salvage Heap: 2
Rewards
Aurel: 130 + (4 × reward level), plus one armor choice. The journal fixes the reward level when the assignment begins.
Reveal quest dialogue (spoilers)
Introduction
We need fresh work at the Reedwater Fishing Pool and the Moonfen Salvage Heap. Take a look while you're making the Moonfen Salvage Reach crossing.
Completion
Fresh observations, from someone who did the work. That gives the workshop something useful to go on.
Commissions · Cinderwake CalderaCinderwake Caldera: Clear the CrossingJori Dhal · Level 100 minimumView assignment
Jori Dhal · Cinderwake Caldera · Commission slot 1
Objectives
- Defeat hostiles in Cinderwake Caldera: 18
Rewards
Aurel: 120 + (4 × reward level), plus one armor choice. The journal fixes the reward level when the assignment begins.
Reveal quest dialogue (spoilers)
Introduction
If you're making the Cinderwake Caldera crossing, cut down the hostiles along your route. Keep your party together until extraction opens.
Completion
Your work will help the next crew through. Here's the payment for the threats you dealt with.
Commissions · Cinderwake CalderaCinderwake Caldera: Supply ParcelNessa Quill · Level 100 minimumView assignment
Nessa Quill · Cinderwake Caldera · Commission slot 2
Objectives
- Deliver Cinderwake Silverfin: 4. Consumed at turn-in. Find farming locations
- Deliver Cradle Nickel Ballast: 4. Consumed at turn-in. Find farming locations
Rewards
Aurel: 140 + (4 × reward level), plus one armor choice. The journal fixes the reward level when the assignment begins.
Reveal quest dialogue (spoilers)
Introduction
I can use Cinderwake Silverfin and Cradle Nickel Ballast from the Cinderwake Caldera supplies. Only take this parcel on if you have the stock or already mean to make the crossing.
Completion
That's enough for this requisition. I'll get these supplies to the people waiting for them.
Commissions · Cinderwake CalderaCinderwake Caldera: Pools and SalvageHesta Coil · Level 100 minimumView assignment
Hesta Coil · Cinderwake Caldera · Commission slot 3
Objectives
- Complete fishing at Cinderwake Silverfin Pool: 2
- Complete scrounging at Cinderwake Ceramic Salvage Heap: 2
Rewards
Aurel: 130 + (4 × reward level), plus one armor choice. The journal fixes the reward level when the assignment begins.
Reveal quest dialogue (spoilers)
Introduction
We need fresh work at the Cinderwake Silverfin Pool and the Cinderwake Ceramic Salvage Heap. Take a look while you're making the Cinderwake Caldera crossing.
Completion
Fresh observations, from someone who did the work. That gives the workshop something useful to go on.
Commissions · Gutterbloom UnderwaysGutterbloom Underways: Clear the CrossingJori Dhal · Level 150 minimumView assignment
Jori Dhal · Gutterbloom Underways · Commission slot 1
Objectives
- Defeat hostiles in Gutterbloom Underways: 18
Rewards
Aurel: 120 + (4 × reward level), plus one armor choice. The journal fixes the reward level when the assignment begins.
Reveal quest dialogue (spoilers)
Introduction
If you're making the Gutterbloom Underways crossing, cut down the hostiles along your route. Keep your party together until extraction opens.
Completion
Your work will help the next crew through. Here's the payment for the threats you dealt with.
Commissions · Gutterbloom UnderwaysGutterbloom Underways: Supply ParcelNessa Quill · Level 150 minimumView assignment
Nessa Quill · Gutterbloom Underways · Commission slot 2
Objectives
- Deliver Gutterbloom Gutterfin: 4. Consumed at turn-in. Find farming locations
- Deliver Choirstone Quartz: 4. Consumed at turn-in. Find farming locations
Rewards
Aurel: 140 + (4 × reward level), plus one armor choice. The journal fixes the reward level when the assignment begins.
Reveal quest dialogue (spoilers)
Introduction
I can use Gutterbloom Gutterfin and Choirstone Quartz from the Gutterbloom Underways supplies. Only take this parcel on if you have the stock or already mean to make the crossing.
Completion
That's enough for this requisition. I'll get these supplies to the people waiting for them.
Commissions · Gutterbloom UnderwaysGutterbloom Underways: Pools and SalvageHesta Coil · Level 150 minimumView assignment
Hesta Coil · Gutterbloom Underways · Commission slot 3
Objectives
- Complete fishing at Gutterbloom Gutterfin Pool: 2
- Complete scrounging at Gutterbloom Courtyard Salvage: 2
Rewards
Aurel: 130 + (4 × reward level), plus one armor choice. The journal fixes the reward level when the assignment begins.
Reveal quest dialogue (spoilers)
Introduction
We need fresh work at the Gutterbloom Gutterfin Pool and the Gutterbloom Courtyard Salvage. Take a look while you're making the Gutterbloom Underways crossing.
Completion
Fresh observations, from someone who did the work. That gives the workshop something useful to go on.
Commissions · Mirrortide ExpanseMirrortide Expanse: Clear the CrossingJori Dhal · Level 150 minimumView assignment
Jori Dhal · Mirrortide Expanse · Commission slot 1
Objectives
- Defeat hostiles in Mirrortide Expanse: 18
Rewards
Aurel: 120 + (4 × reward level), plus one armor choice. The journal fixes the reward level when the assignment begins.
Reveal quest dialogue (spoilers)
Introduction
If you're making the Mirrortide Expanse crossing, cut down the hostiles along your route. Keep your party together until extraction opens.
Completion
Your work will help the next crew through. Here's the payment for the threats you dealt with.
Commissions · Mirrortide ExpanseMirrortide Expanse: Supply ParcelNessa Quill · Level 150 minimumView assignment
Nessa Quill · Mirrortide Expanse · Commission slot 2
Objectives
- Deliver Mirrortide Sunscale Bream: 4. Consumed at turn-in. Find farming locations
- Deliver Lenssilver Ore: 4. Consumed at turn-in. Find farming locations
Rewards
Aurel: 140 + (4 × reward level), plus one armor choice. The journal fixes the reward level when the assignment begins.
Reveal quest dialogue (spoilers)
Introduction
I can use Mirrortide Sunscale Bream and Lenssilver Ore from the Mirrortide Expanse supplies. Only take this parcel on if you have the stock or already mean to make the crossing.
Completion
That's enough for this requisition. I'll get these supplies to the people waiting for them.
Commissions · Mirrortide ExpanseMirrortide Expanse: Pools and SalvageHesta Coil · Level 150 minimumView assignment
Hesta Coil · Mirrortide Expanse · Commission slot 3
Objectives
- Complete fishing at Sunscale Bream Pool: 2
- Complete scrounging at Mirrortide Lens-Rig Salvage: 2
Rewards
Aurel: 130 + (4 × reward level), plus one armor choice. The journal fixes the reward level when the assignment begins.
Reveal quest dialogue (spoilers)
Introduction
We need fresh work at the Sunscale Bream Pool and the Mirrortide Lens-Rig Salvage. Take a look while you're making the Mirrortide Expanse crossing.
Completion
Fresh observations, from someone who did the work. That gives the workshop something useful to go on.